Monday, October 31, 2011

Halloween porch

Hello dear readers.  I wanted to pop in and share a few pictures I took this morning after sprucing up the porch.


It's quiet around here again and we have our driveway back since the house is officially done.  Well, except for a few touch ups here and there but that shouldn't be a big deal.  I planned on posting as the house renovations progressed but that just didn't happen. 


So I'm giving you a little peek of the house today with more pictures on the way.


I found the mouse silhouettes at Michaels...gotta love that Martha Stewart. 


I'm off to get our Monarch butterfly ready for some trick or treating.  Happy Halloween!

***Update*** To see the finished exterior makeover click here.

Tuesday, October 18, 2011

Two windows a portico and soffits

So much has been going on with the exterior remodel, just not enough time to post.  For starters, the non existent soffit on the front of the house has been extended.  At first we talked about building them out to twenty four inches but I changed my mind and went with eighteen, the back of the house will be the same. The side soffits hung out at about five inches, now they are twelve. 


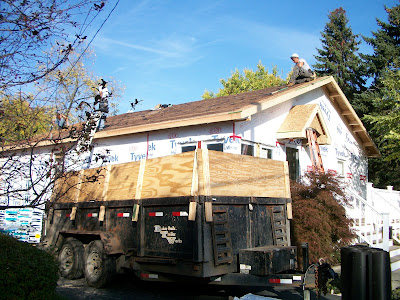
The old shingles were removed after the roof extensions were framed...that way the shingles will all match.  Our roof was almost twenty years old so we were going to need a new one soon anyway.  And looky there...my little portico was starting to take shape.


A reminder of what the roofline looked like before.  Also, take note of that single window sitting all by himself.


I have been talking about adding another window to the front of the house for so long.  So when the day finally came we were ready.  Our house was built in the forties so we made sure to take precautions for lead paint.  If you have ever cut through plaster walls, you know what I'm talking about when I say it's going to be a huge dusty mess.


Now let me tell you about the mistake.  See the new windows in the picture above?  Well, right after it was installed something didn't feel quite right.  I couldn't put my finger on it but I wasn't as thrilled as I thought I would be.  When Mr. 65th got home he knew right away that we needed two separate windows instead of one unit. 


Remember this horrible picture of the living room windows?  Two separate windows.


Well now we have matching windows....two separate matching windows.  Much better. 

I have to say that being on the job and having to make quick decisions here and there without another opinion has been tough.  Especially when I had to be a big girl and tell our guy that he had to rip out the window he just put in.  Not fun.


I have a big crush on porticos and brackets, so you can only imagine how excited I am to share this picture.  If I was on pinterest...which I really need to be...you would be able to see all the portico and bracket inspiration I dug up.

Oh, and here is a sneak peek of the siding color.  Remember how crazy I was trying to pick a color?  Well I am happy to say...I love it. 

Until next time.

Wednesday, October 12, 2011

The Sixty-Fifth Avenue makeover

Part one of ???  The exterior remodel has finally begun.  I am so very excited but I have to admit, there are a few nervous butterflies in my belly too.

The plan for our little casa is to bring in some character and dimension to the flat facade.  (You can see the plan here if you missed it.)  Some old houses were built that way, but not ours. 

I thought I would start off with some really ugly pictures.  It can only get better from here right? 

When taking the layers off an old house you can never be sure what lies beneath. 


Turns out, when someone installed vinyl siding over the original wood siding, they added a layer of insulation.  It's old, but good news since we had a feeling the walls were not insulated and we would have to have that done before the Tyvek wrap went on.  The lovely picture you see above is two of the living room windows on the side of the house.  


The one above is of the front living room windows.  Someone long ago thought a bit of fake stone would look nice wrapped around just one lower corner of the house.  I was happy to have it hidden for most of the year once the Japanese maple grew up.


Then winter would come and there it would be again.  When we added the decorative trim around the front door, we beefed up the trim above the windows to cover the holes left from the metal awnings we ripped down.  The door trim turned out great, but the window trim always looked like it was just tacked on....maybe because it was. :)  The neighbors across the street were surprised to see it being ripped down already.  A new portico will go over the door.

Today the plan is to replace a single window with two on the front of the house.  Three would be better to balance the front of the house but our bedroom is too small to handle that.  How silly to have one sad little window all by himself!  For a symmetric kind of girl this makes me crazy. 


Did I ever tell you about the day we went to see Sixty-Fifth Avenue for the first time?  No?  Well, the house was for sale by owner so we set up a time to come over.  When we pulled up I took one look and said to Mr. 65th...drive away...quick.  It was that ugly.  Then the nice lady of the house came out waving us in...we were stuck.  I walked in with the attitude that we would just run though and leave.  But I started seeing potential and by the time we were done with our tour I was squeezing my new husband's hand.  The rest is history.

I love having a place to write about this project and document our progress.  Stay tuned if you want to see my attempt to create a craftsman style cottage with the budget on hand. 

*edit*   I wanted to add that this project will be left to the professionals and won't be a DIY project. 
 (It seems I can't even leave a comment on my own blog...not sure what that is all about.) 

Wednesday, October 5, 2011

Silhouettes

I have been wanting to make a silhouette of the little one for quite a while now.  And after sitting down to make one I wonder what took me so long, this is such a quick and easy project. 


Maybe it was because I didn't have the right spot to hang one.  Then the other day I started playing around with plates for a plate wall and the light bulb went on.


You see, after I finished painting a dresser on a whim, it became clear that something new was needed for the walls as well.  I remembered seeing a tutorial on how to make a quirky silhouette plate, I just don't remember where I found my original information.


Before I share the newly painted dresser and plate wall, I thought a quick explanation of how I made my silhouette would be fun.                                                                             


First take a picture of your model...its ok if she seems unhappy about it...your project will still turn out ok. 

By the way, we got a siding delivery the other day so work will be starting on the house soon!


I had my picture printed as a 5x7 and cut it out adding some detail to the end of her pony tail.


Then I traced the picture onto scrapbook paper found at Michaels and cut that out.  Using a paint brush I applied a thin coat of mod podge to the center of my plate and pressed my silhouette in place with my fingers.  Oh yeah, I added a tiny strip of paper for an eyelash since my picture didn't have one.


After the first coat was dry I painted another one right on top of my paper silhouette.  That's it...let it dry and you're done. 


Site design by FABULOUS K CREATIVE